
Most yoga teachers fall into one of two camps. Planners, who write out every minute of class in advance and then panic when the room doesn’t do what the spreadsheet says. And improvisers, who show up with a vibe and an opening pose and hope for the best.
Both camps produce their own version of a train wreck. Over-planned classes are rigid, hard to adapt, and usually riddled with mistakes because no one can actually follow a minute-by-minute plan. Fully improvised classes meander, take long pointless tangents, and leave students wondering what the point was.
What you want is somewhere in between. Enough plan that the class goes where it’s meant to go. Enough space that you can adapt to what’s actually happening in the room.
The method I use and teach is called block structure, and it’s the simplest, most flexible class planning system I’ve come across. Here’s how it works.
Start With a Peak
Before you plan anything else, decide where the class is going. This is your peak. It’s usually a pose, sometimes a short sequence, and it sits about two-thirds of the way into the class.
The peak doesn’t have to be the hardest pose you know. It just needs to be interesting enough to build toward. Something with an element of challenge, detail, or intrigue. Warrior Three, Camel, Crow, Hanumanasana, a deeper backbend, a specific twist. Your choice.
Once you’ve picked the peak, three things need to happen on the way to it:
- Warm up the joints that will be under load in the peak pose
- Explore the same joint positions the peak needs, in simpler shapes first
- Practise the key actions the peak requires, using the same language you’ll use when you get there
This is what gives a class a sense of direction. Everything earlier in the class is quietly preparing the body and the mind for the peak moment.
A Worked Example: Warrior Three
 Simon Borg-Olivier demonstrating Warrior Two at the Lanka Yoga shala. Warrior Two is one of the key preparations for Warrior Three.
Say your peak is Warrior Three. In this pose:
- The spine is neutral
- The arms are overhead
- One hip is in flexion, one in extension
- You’re balancing on one leg
Earlier in the class, you’d want to explore poses that put the body in those same joint positions, but with less complexity or load. Tadasana and Downward Dog for spine neutral. Standing upward reach and lunge for arms overhead. Warrior One and Warrior Two for the hip positions. Tree pose and simple standing balances for the balance work.
None of these poses look like Warrior Three. But each of them rehearses a piece of it. By the time the class gets there, the body has already been doing the work. The peak just asks you to put the pieces together.
The Three-Part Shape of a Class
Every good yoga class has three phases. Think of it like a song or a film. There’s a build, a climax, and a resolution.
Phase 1 — Warm up. The longest phase, usually a bit more than half the total time. Warm up the vulnerable joints, explore the joint positions needed, practise the key actions. Use joint movements, spinal movements, sun salutations, Hatha postures, whatever fits. As long as the touchstones are in there, what happens between them is up to you.
Phase 2 — The Peak. Where everything comes together. This is the “aha” moment that ties the work you’ve done up to this point into one pose or sequence. A few ways to deliver it: workshop the peak pose in stages, repeat a vinyasa sequence that includes it, or repeat the peak itself two or three times with added detail.
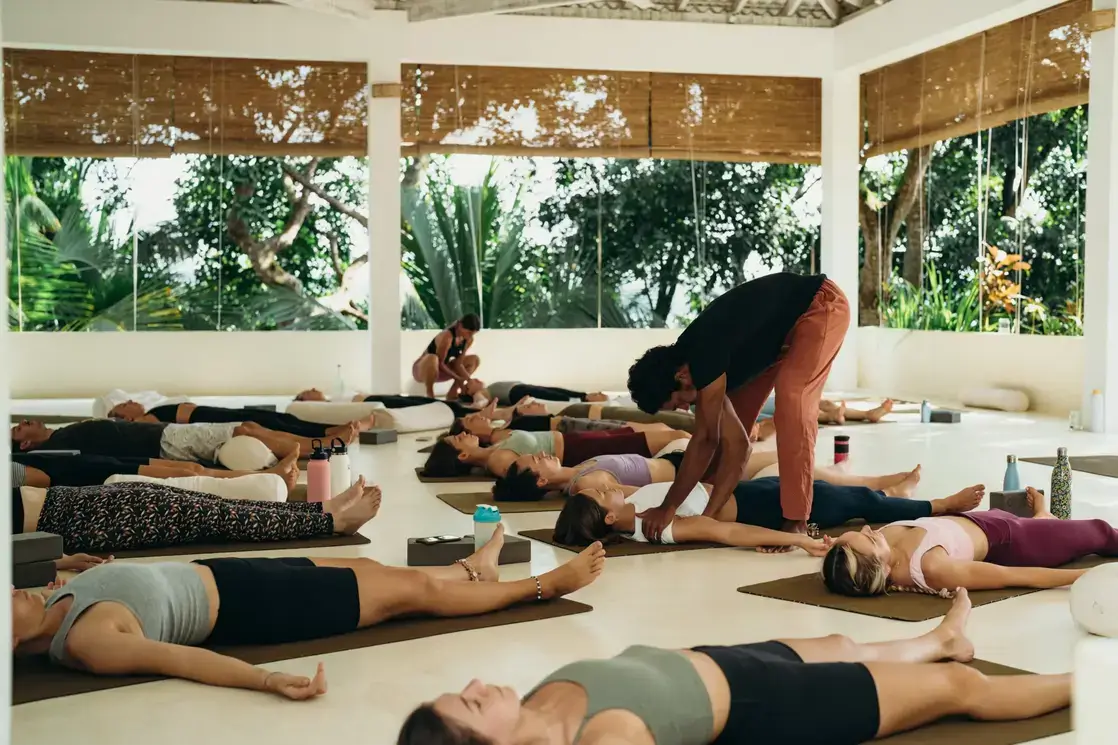 Savasana needs as much forethought as the peak. It’s what people actually remember about the class.
Phase 3 — Relaxation to Savasana. Counter the strong work, bring the body back into balance, and prepare for rest. Neutralising poses, simple twists, softer language, softer music, softer light. Savasana needs as much forethought as the peak. Done properly, it’s what people actually remember about the class.
Putting It All Into Blocks
Now we put this into block structure.
For a standard 60-minute class, use six 10-minute blocks. The exact titles of each block will depend on what style you teach, but a typical vinyasa-style structure looks like this:
- Warm-up / mobility — gentle opening movements, wake up the vulnerable joints
- Standing sequence or sun salutations — introduce joint positions and key actions
- Building flow — longer vinyasa sequences or held postures moving toward the peak
- Peak — how you’re approaching the peak
- Counter poses and cool down — balancing the work done
- Savasana — any notes for relaxation
That’s it. You fill in the right-hand side of each block with whatever detail you need, and you’re done.
The reason this works:
- The basic plan is obvious. You just fill in the gaps.
- There’s a natural balance between planning and improvising.
- Timekeeping becomes easy. Six short blocks to manage, not sixty minutes.
Keep two versions of your notes. The first is your planning version, with more detail. The second is a shorthand version, written bigger and cleaner on a smaller sheet or in a nice notebook. That second version is the one you actually teach from. It needs to be easy to glance at, and it’s fine if students see it.
One rule: don’t overdo the detail. Leave space for improvisation. That’s the whole point.
Shorter or Longer Classes
When you teach a class that isn’t 60 minutes, you don’t need to reinvent anything.
Option 1: lengthen or shorten the blocks. A 75-minute class = 12.5-minute blocks.
Option 2: add or remove blocks. A 40-minute class = four blocks. A 90-minute class = nine blocks.
Option 3: a mix. Some longer blocks, one or two extra ones.
There’s no one right answer. Pick the version that makes sense for what you’re teaching.
Making the Vinyasa Part Interesting
The one thing that trips up newer teachers is the vinyasa block. How do you create interesting, flowing sequences without losing yourself or your students?
The trick: every vinyasa sequence is just a sun salutation with poses added or taken away. Memorise one sun salutation variation until it’s second nature. Then notice the moments in the sequence where you can detour: from lunge, from down dog, from lying on the belly. Add a pose or two at those moments, then return to the sequence you already know.
You’re not inventing anything from scratch. You’re detouring briefly from a route you’ve already memorised, and returning to it. That’s how experienced teachers make it look effortless.
Why Block Structure Works
Block structure works because it respects how teaching actually happens. You can’t script a yoga class perfectly, because every room is different. But you also can’t walk in empty-handed and expect to teach a good class. Block structure gives you the scaffolding without the rigidity.
It’s one of the first things we teach across our Yoga Teacher Trainings at Lanka Yoga in Sri Lanka, because it’s what lets newer teachers stop panicking about their plan and start actually teaching. Once you’ve got this, the rest gets much easier.
If you’d like to read more on how we approach teaching, have a look at What is the Yoga Synergy Method? or The 8 Limbs of Yoga, Explained Properly. If you’re weighing up where to do your training, my guide on Choosing the Right 200-Hour YTT in Sri Lanka is a good place to start.
Written by
Stefan Camilleri
Stefan is the founder and lead trainer at Lanka Yoga on Koggala Lake, Sri Lanka. He’s been running yoga teacher trainings for over 10 years and teaches the Yoga Synergy method — an evidence-based approach to movement, anatomy, and breath.